Search This Blog

31 May 2011

Monday 30th May 2011; Firenze (Florence) and Pisa

Week 8 of 12 
Module 5: Conservation Interventions and Treatments; Criteria for Selection and Implementation 
The Study Tour: Florence (Firenze)


Yesterday we began our study tour of Northern Italy driving from Rome to Firenze (Florence). The afternoon was ours to spend as we chose and the group mostly divided between the Uffizi Gallery and the Bargello National Museum. A few of us also managed to fit in a climb up the bell tower that's part of the Basilica di Santa Maria del Fiore (a.k.a. the Duomo).


View of the Duomo, Firenze, from the tower.


This morning we first headed to the Opificio delle Pietre Dure where we visited the museum and then the restoration laboratory. In the museum we were talked through the history of the Opus Sectile technique where by precious or semi-precious stones are precisely cut to create an image. The photographs below show a pair that were present in the museum of the initial painting and below it the opus sectile that was created using the painting as a guide- as you can see it is quite incredible how much detail these artists were able to achieve. The museum holds a fantastic collection of the precious and semi-precious stones from around the world displayed in glass cabinets and examples of 19th Century work benches where the pieces of stone were able to be finely carved.


A painting the was produced as a means for creating an opus sectile. This scene illustrates stone masons.


An example of one of the opus sectile which has been prepared based on the painting above.


Display showing work benches for preparing the tesselae.


In the laboratory we were shown some of the current stone conservation projects being undertaken including restoration of stone sculptures and mosaics. We also saw some new mosaic and opus sectile work which was being created by restoration students. What was fantastic to see was that the same workbenches and techniques that we'd observed just 30 minutes before in the museum were still being used in the workshop today (see photo below).


The restoration laboratory where the 19th Century workbenches and techniques are still being used today for finely carving stone.


We then had a brief visit to the Museo dell'Opera di Santa Maria del Fiore where Peter Rockwell (who's accompanying us for the first part of the study tour) showed us an incomplete sculpture 'Pieta' by Michelangelo and other select pieces. The sculpture was originally created to go on Michelangelo's own tomb but he took a dislike to it before it was completed and it was never finished. Peter thinks that one of the major factors that would have made Michelangelo dislike this sculpture is the disproportionately small Mary Magdalene figure on the left-hand side of the group (see photograph below). Another sculpture (dated 1334-36) that Peter picked out to show us was by a sculptor called Andrea Pisano and depicts a stone mason at work illustrating the many different tools that were used at that period and most of which are still in use today (see photograph below). One tool that Peter pointed out is no longer used in Italy is the round-headed hammer; in Scotland we call this a 'mell' and it is in common use today made from metal, wood or fibreglass.


Michelangelo's Pieta.


Peter Rockwell with a stone carving by Andrea Pisano depicting a stone mason dated 1334-36.


We then continued our travels and moved on to Pisa where we received a presentation regarding the conservation work carried out on the 'leaning tower' in the last decade and then explored the World Heritage Site including climbing the tower.  Climbing the tower gives you a very strange sensation, something like sea-sickness; the staircase winds clockwise around the inside of the building within two walls, and although you are constantly going 'up' the stairs, the angle as you walk towards the overhang is low and as you walk away from it is high. 


The Leaning Tower of Pisa. 


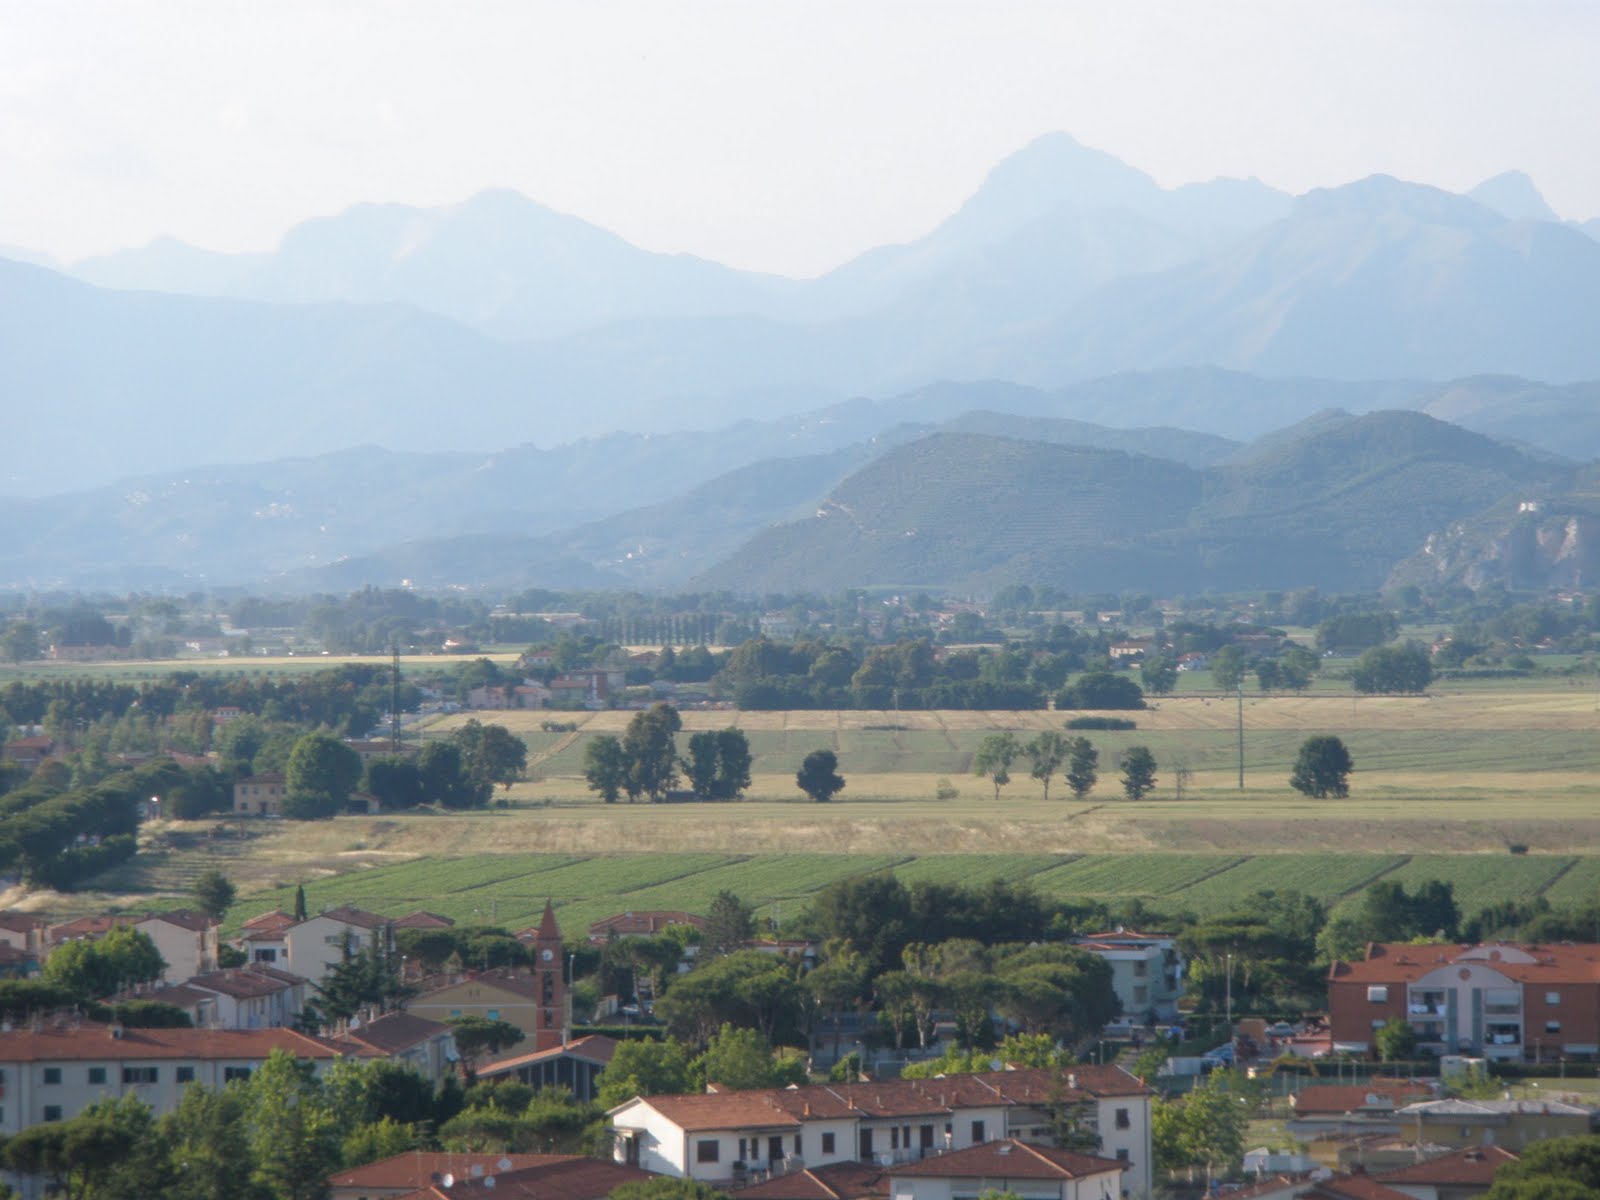
Tomorrow we continue on to Carrara to visit the famous white marble quarries in the Apuan Alps, which were just visible from the top of the tower.


View from the tower; the mountains containing the Carrara white marble quarries (just visible in the distance at the top of the mountains in the left-hand side of the picture).

29 May 2011

Friday 27th May 2011; Surface Treatments and Cleaning Techniques

Week 7 of 12 
Module 5: Conservation Interventions and Treatments; Criteria for Selection and Implementation

David Odgers was with us all day today speaking to us about surface treatment of stone and cleaning techniques. Both of these topics are highly relevant to my work at the Scottish Lime Centre Trust because we are constantly dealing with the problems caused by past inappropriate surface treatments and cleaning techniques and provide advise on methods for the future. In the last session of the day we were presented with a tricky and on-going case study which we discussed in small groups. This was a great opportunity to think through the issues that we have been discussing, from both a materials and a conservation perspective.

Details to follow...

Thursday 26th May 2011; Vatican Visit, Archaeological Site Repairs & Wells Cathedral Case Study

Week 7 of 12 
Module 5: Conservation Interventions and Treatments; Criteria for Selection and Implementation


We were very privileged to have a visit to the Vatican today to meet Guy Devreux, head of the Stone Restoration Laboratory to be taken behind the scenes and shown some of the current projects being carried out. Guy is another predecessor of ours having studied on the ICCROM Stone Course in 1991.

We visited the site behind the screened part of the Colonnade to observe the conservation works being undertaken.


This afternoon Gionata Rizzi showed us some of the archaeological site projects he has worked on as case studies followed by David Odgers giving us a case study of conservation work carried out at Wells Cathedral in Somerset, England.

Details to follow...

26 May 2011

Wednesday 25th May 2011; Structural and Architectural Repairs

Week 7 of 12 
Module 5: Conservation Interventions and Treatments; Criteria for Selection and Implementation

This morning Ian Hume, a conservation structural engineer from the UK, joined us to speak about 'Structural Repairs'. I was very pleased to see Ian Hume teaching on this course because he is one of our trainers at the Scottish Lime Centre Trust where he teaches a course on the Structural Repair of Historic Buildings. The main subject of Ian's lectures was 'cracks' and their interpretation. We get very worried if we see a crack in a building but Ian has told us to assess each situation separately to identify if the crack is worth worrying about. A good example of the extreme contrast in danger is that if a crack appears on an oil rig which is 0.1mm wide we may have reason to worry, whereas on a historic building it is possible to have a crack up to 1 metre wide and it will not necessarily be a concern (although I would imagine this is only the case if we're talking about a ruin!). The key things to identify are; is the cracking live? Is the cracking structural or due to other factors? Is it a seasonal or cyclic cracking? Where cracks are present in a structure we do expect them to have some movement due to thermal expansion and contraction and as long as the crack is not getting wider in the long term this is most likely not a concern. A problem faced with seasonal cracking however is that a ratchet effect can occur whereby debris falls into the crack when it's at its widest and it is then not able to contract to its starting position and the crack will widen.

To identify if a crack is active or inactive you should always measure it over a period of time (bearing in mind seasonal movement) but there are also pieces of evidence you can look for such as does the crack look fresh/sharp (new?) or are the edges rounded (old?), is it full of debris/cobwebs (old?), if an internal wall is cracked is the cornice also cracked? Some cracks may have existed in a building since it was constructed due to the subsidence that occurred from the weight of the construction materials- this should not be a concern.

Although it is possible to calculate a certain level of stresses and strains on an historic building, Ian believes they they are not definitive and should only be used as a guide. Temporary works are extremely important and often they can be in place for a very long time so they need to be well thought out and durable. This can be difficult because good attachment to the structure is not always possible. Ian was very clear on the fact that we should always employ an engineer with experience of historic buildings; as a young engineer in the 1970s he severely over engineered an historic structure which he believes could, even now, survive a nuclear attack but was not carried out in a manner sensitive to the site (see image below).

Ian showing an image of one of his first jobs as a conservation structural engineer where he believes he might have over done the reinforcement... (just the walls are original).


This afternoon Gionata Rizzi spoke to us about Architectural Repairs. One of the biggest questions seems to be how can we repair something without faking it? In relation to mortar Gionata suggests that one way we can make it clear for future that a mortar is not an original would be to use polypropylene fibres (in place of hair which give a mortar strength). This way if the surface of the mortar is scraped back the fibres would be visible and it would be clear that this is a modern material. A building that has come up in conversation a couple of times now is the Temple of Athena Nike which is located on the Acropolis in Athens, Greece and has recently been restored. Although a large proportion of the original blocks still exist, many parts were missing and the recent restoration included highly skilled masons carving the missing elements out of a stone found to match the original to complete the wall once again. There is no question about the skill involved to do this but Gionata asks; does this fake the discovery of the missing pieces? Should the missing elements have been recreated in mortar rather than stone? Our eyes are drawn to the restoration before the original, is this wrong? The image I have added below of one of the walls is poor but if you click on the link above you will find many links to images and websites dedicated to this structure and can decide for yourself.

A restored wall of the Temple of Athena Nike.

25 May 2011

Tuesday 24th May 2011; Repair Approach & Options Overview

Week 7 of 12 
Module 5: Conservation Interventions and Treatments; Criteria for Selection and Implementation

Gionata Rizzi and David Odgers both rejoined us today to give us an overview of the conservation approach and options for repair. Gionata started with the example of the famous Marcus Aurelius bronze statue which stood outside in Rome from 176AD (in Piazza del Campidoglio, Rome, since 1538AD). In the 1980s it was considered to be deteriorating but what was the most appropriate solution to this problem; leave it outside? Bring it inside? Protect it in situ with a shelter? Remove it and replace it with a modern sculpture? Remove it and replace it with a replica? The result of the debates that went on were to move the original inside and to replace it with a replica (see photographs below). Was this the correct decision?

Gionata Rizzi with his likeness Marcus Aurelius (the genuine original sculpture) debating the options of how to protect the famous sculpture.

The replica of the bronze Marcus Aurelius sculpture which is in place in Piazza del Campidoglio.


When undertaking conservation work we have the debate as to what are the most important values of a structure. Does appearance come before function or function before appearance? When we are working outside our own countries or cultures it is also essential that we fully understand what a structure means to the local people. I believe it was Simon Warrack who gave us an example recently of a sculpture of a God within a temple which had lost 3 of it's 8 arms which are essential for its correct representation. We may debate that it's incorrect to 'restore' this sculpture with new arms, however the key value of this sculpture is related to its form and not it's history and therefore in this case it may be considered appropriate to carry out the restoration. David listed the four main values that we assign to historic structures which are historical, evidential, aesthetic and communal. The order in which these are put will vary from project to project and from person to person.


We had a discussion on the values of 'reversibility' which is increasingly documented in charters as what we should always be aiming to achieve with conservation work. The general feeling seems to be that although this may be a desirable quality it is rarely achievable. The argument may be better if we aim for 'compatibility' rather than 'reversibility'. The use of organic resins is considered to be reversible because technically they can be dissolved, however in practice it is almost impossible to fully remove them from a stone. 


When we do proceed with conservation work one of the most important things for us to do as conservators is to record everything. A condition report and schedule of works should be written for someone else in 50 years time and who may never have visited the site, therefore details which may seem obvious to us must still be recorded. It is essential that in such records we always use the cardinal points (N, S, E, W) for locations because we do not know how the surrounding environment or position or a structure or object may change before our documentation will be revisited. 


When making the decisions about repairs on a historic structure we must remember that it may well be several decades before this type of work is carried out again and therefore we need to consider future preventative measures as well as solutions for present issues. David presented us with a very interesting case and not one with an easy answer; if you have a ruin where much of the stonework is heavily decayed, what is the best solution? Potential answers include; do nothing, replace the stonework following the original profile (see image below), replace the stonework following the current profile, falsely weather the stone to blend in with the present masonry... Here we need to consider many different values including form, function, material etc. To guide us to an answer we need to consider; what we know (e.g. current condition), what we think we know (e.g. the likely effect of our treatment/repair) and what we don't know (e.g. what conditions, use and maintenance will occur in future).


David Odgers asking us how we would carry out this repair on heavily weathered stonework.


Below is a quote from Donald Rumsfeld (former US Secretary of Defence) shown to us by David, which although on a different subject sums up very nicely the issues we face in conservation.

Donald Rumsfeld 2002. 

23 May 2011

Monday 23rd May 2011; Microbiological Deterioration

Week 7 of 12 
Module 4: Deterioration Mechanisms; Methods of Survey & Analysis

Today Ornella Salvadori, a biologist and the director of the Scientific Laboratory at the Ministry for Cultural Heritage (Soprintendenza per i Beni Artistici e Storici di Venezia), spoke to us on the topic 'Microbiological Deterioration', following on from the lectures from Giulia Caneva last week (see Friday 20th May 2011; Biodeterioration & Visit to Instituto Superiore per la Conservazione ed il Restauro). It was particularly interesting to have Ornella with us because she attended one of the first ICCROM Stone Conservation Courses in 1979.


Ornella described biodeterioration as almost a new science because in the past biodeterioration was only considered to be a discolouration of the surface. Even starting at this point it is not as simple as discolouration simply due to the visual observation of the organisms. There are other reasons for the visual change which include the alteration of minerals by the organisms present and the production of pigments which are then deposited within the stone. For this reason when analyses are carried out in relation to biological activity it is always necessary to combine chemical and biological analyses to fully understand the alteration.


We discussed the 'bioreceptivity' of stone, that is the ability of a stone to be colonised. Ornella showed us the three environments in which organisms live within stone; epilithic (on the surface), chasmolithic (within cavities) and endolithic (organisms that have bored from the surface into the stone through mineral grains). Where growth is present on the stone's surface it will not always be visible and even where it is we will not necessarily be able to identify if there is also growth below the surface. It is essential to understand this when carrying out stone cleaning because although a stone may be superficially clean, not all organic material will necessarily have been removed.


Environmental habitats of organisms within stone.


It can be difficult in the field to identify if a dark patina on stone is organic or inorganic, but the general rule that can be followed is that where water is frequently feeding the area, the patina is likely to be organic and where the area is likely to remain fairly constantly dry then this is likely to be inorganic. If you wet the darkened area an inorganic layer (e.g. pollution crust) would show very little change, whereas an organic layer would take on a slimy texture and you may see a slight alteration in colour to brown-green which can give you an additional indication of its origin. 


Environmental conditions such as humidity are very important in dictating the type of biological growth likely to be present on an organism; bacteria generally need >90%RH to develop whereas it is much less for fungi. Ornella's specialism is in lichens and she explained to us how lichens are formed by the symbiosis between a cyanobacteria and a fungi. Lichens come in several different epilithic forms and also endolithic forms. Ornella summarised the three main groups of organisms found on masonry for us, these are cyanobacteria, fungi and lichens. 


Learning about lichens.


The main message of the lecture was that there can be such a wide variety of biological growth on stone that we should not generalise and simply say 'biological growth' in our observations; different species can and will have very different implications.


This afternoon we went to the Non-Catholic Cemetery to visit out work sites and inspect the biological growth present on each of the six tombs to be conserved and we identified a wide range of lichens, algae and fungi.


A Russian tomb being conserved by Stefaan (Belgium), Suzanne (Denmark) and Svetlana (Russia).


The tomb of Violet May Courte (1868-1914) being conserve by Rong (China), Antonia (Portugal) and Illeana (Romania).


The tomb being conserved by Eliane (Brazil), Jakub (Czech Republic), Sumedha (Sri Lanka) and Dodie (Sudan).


The tomb of Florence Baldwin (-1918) being conserved by myself and Anita (Australia). In the background are Amanda Thursfield (Director, Non-Catholic Cemetery), Nicolas Stanley Price (Ambassador for Non-Catholic Cemetery and previous Director General ICCROM) and Simon Warrack (Stone Course Coordinator and ICCROM Stone Conservation Consultant).


Belinda Lee's tomb being conserved by Valerie (India) and Michel (Palestine).


The tomb of Herman Wichmann (1824-1905), a conductor, being conserved by Irakli (Georgia), Jiyoung (Korea), Rutger (Holland) and Rouba (Syria).

21 May 2011

Friday 20th May 2011; Biodeterioration & Visit to Instituto Superiore per la Conservazione ed il Restauro

Week 6 of 12 
Module 4: Deterioration Mechanisms; Methods of Survey & Analysis


This morning we had a visit to the neighbouring Instituto Superiore per la Conservazione ed il Restauro. The Instituto was founded in 1939 and introduced a 'modern' concept of restoration considering 'historical criteria' and 'scientific research'; a transition from the old idea of 'artistic restoration'. We visited the stone conservation workshop and one of the materials analysis laboratories.

In the stone conservation workshop we were shown several of the sculptural projects currently being worked on including one which was a white marble sculpture of a figure, of which just the torso and lower body (minus feet or base) remained. The main issues faced with this sculpture included removing rusted iron pins from joints, repairing cracks and identifying how to reattach the upper and lower parts. In addition, the lack of a base creates a conservation debate as to how this sculpture can be displayed in a museum. Historically, holes were often drilled in the stumps of the legs and steel bars inserted and then attached to a base, elevating the sculpture to the appropriate proportional height. This however would cause irreversible damage to the stone and therefore is no longer considered a favourable option. Something I had not seen before having worked little with sculpture was the use of sand for supporting the stone. No base exists and so the legs have been placed into a tub of sand which allows both the sculpture to be stored without pressure on weak points and for it to be in a position that the torso can be tested above it for positioning etc (see image below).

The torso and lower half of a sculpture undergoing conservation in the Instituto stone conservation workshop.

We then visited one of the laboratories and were shown several of the pieces of instrumentation used for materials analysis. We were shown the thin section taken of a sample of paint that had been removed from a sculpture that we observed in the stone conservation workshop. This analysis was being carried out to identify the pigments used on the sculpture for identifying appropriate/compatible materials for cleaning the surface dirt without removing the paint (see images below).

The sculpture with traces of paint in the Instituto stone conservation workshop.


In the Instituto laboratory being shown the thin section of the paint removed from the sculpture pictured above using an optical microscope with the image shown on the screen behind.

In the second half of this morning and this afternoon Giulia Caneva, a biologist specialised in biodeterioration of monuments and plant ecology, came to talk to us on her subject. Biodeterioration is defined as 'any undesireable change in the properties of a given material that is caused by the activity of living organisms'. Giulia told us that in general biodeterioration stems from the utilisation of the substrate as a source of nourishment, however sometimes it is simply used as a living habitat. It is not always the mineral composition of a stone from which organisms can get nourishment, but in addition stone gains a build-up of organic material from dust, pollution and past restoration treatments. Biodeterioration can be conditioned by the 'characteristics of the material' or the 'characteristics of the environment'.

It can be easy to confuse some 'biofilms' (organic patinas) with chemical deposits/attack. The general rule seems to be that in a generally dry environment deposits are likely to be inorganic and those which have a constant feed of water will be organic.

In a masonry wall composed of a single stone type it often occurs that some blocks of stone will be entirely unaffected by a biofilm which is present across the rest of the wall (see image below). Studies that Giulia has carried out indicate that this is linked to the porosity of the stone and a very small reduction in porosity can make a particular stone an inhabitable environment for a specific organism. Different stone types are also more attractive habitats for different organisms- something that we can utilise for identifying different stone types in vernacular buildings and a tool that geologists use when carrying out field mapping.

Images in one of Giulia's slides showing the preferential colonisation of specific stones whilst leaving surrounding stones untouched.


It is worth noting that organisms are not always considered to be damaging to stonework, and even if they are it does not always mean that removal is the best solution. An extreme example of this would be where tree roots have taken over and moved through a structure; whilst still in place and continuing to grow, they will continue to cause damage to the structure, but they may also be holding the structure in the position that it currently stands and their removal could result in collapse.

Giulia made the point that unless it has already been decided that organisms should be removed from the surface of a stone (regardless of whether or not they are causing damage), it is not sufficient to limit oneself to generically identifying the taxonomic group (e.g lichens/algae/plants). This type of ecological study should not be seen as a stand-alone set of information and the skills of the biologist can add greatly to the understanding of the environment of the structure including variations in temperature, moisture and sunlight which could be inferred from the presence of the organisms present.

20 May 2011

Thursday 19th May 2011; Salts

Week 6 of 12 
Module 4: Deterioration Mechanisms; Methods of Survey & Analysis


Alison Heritage is the Conservation Research Specialist at ICCROM and is a specialist in salt weathering which was the topic of this morning's lectures and this afternoon's practical laboratory class. Alison started her lecture by introducing us to the basic chemistry necessary to understand salts. Salts are ionic crystalline solids formed by the electrostatic attraction of positively charged cations and negatively charged anions. Cations (+) of sodium, calcium, magnesium and/or potassium combine with anions (-) of sulphate, nitrate, chloride, carbonate and/or phosphate to create a salt. Our common table salt is a combination of sodium and chloride. Salts can reach our masonry structures from many different sources including salts which are already present in the construction materials (autochthonous salts), from the ground water, biogenic sources, atmospheric salts and marine salts. 


But are all salts damaging? No. Alison identified a few examples of salts which are not damaging to historic buildings; calcium carbonate (a.k.a. limestone or lime putty) and copper chloride (a 'salt-green' pigment). Salt damage is caused by salts that are soluble, or sparingly soluble in water. If salt crystals develop slowly inside the pores in a stone they will grow through the pores and result in little damage. However, it is when the salt solution inside a pore becomes super-saturated and rapid crystallistion occurs when the solution reaches 'critical saturation' that some of the pressure exerted by the crystal growth will be exerted on the pore walls and not simply through the connecting pores. The greater the super-saturation, the more pressure crystal growth can exert on the stone. 


Most of us will have carried out an experiment at school of heating up a salt solution to see the water evaporate and the crystalline salt remaining. Different forms of salt require different amounts of water to stay in a soluble state, from potassium nitrate which will crystallise if humidity falls below 93% to lithium chloride which will stay in a soluble state until humidity drops below 10%. It is not just humidity that affects salt crystallisation, but many salts are also affected by variations in temperature. The speed of the fluctuations (rapid drying or rapid cooling) are the factors that create the environment for super-saturation and therefore damage to occur. If the environment remains above or below the point of crystallisation of a particular salt then it will be stable and will not damage a stone, it is where the environmental factors fluctuate and repeatedly cross the relative humidity and temperatures at which a phase change occurs that damage will be an issue. In addition, in the majority of cases there will not always be a singular salt present, but may be several and therefore how do we identify the appropriate stable environmental conditions?


As highlighted by Ippolito Massari in the last two days of lectures (see Day 24 (17.05.2011) and Day 25 (18.05.2011)), understanding the source of your problem is essential before you attempt to take remedial action. In Scotland we commonly see the tell-tale signs of a wavering mark a metre or two up the side of a wall where rising damp has been able to reach and evaporated leaving its deposits of salt. In some cases this may appear to be damp, but to understand if the rising damp is a current issue we need to identify whether the wall below is damp and to identify the form of salt present. Certain forms of salt are hygroscopic (they attract and hold water molecules) and therefore it may be that the problem has been fixed and that the dampness is due to hygroscopic salts.


Some basic salt demonstrations were carried out in this morning's lectures; the image shows a brick which has been left in a salt solution.


This afternoon we were split into small groups in the laboratory and were given 4 bricks which had been saturated with a known salt solution and then dried leaving visible efflorescence on the surface. We were introduced to numerous different techniques from simple flame and pH tests to optical microscopy for identifying the different forms of salt present and it was our task to identify the salts that were present in our brick samples.


This afternoon's laboratory session involved us using various analytical techniques to identify the types of salt present in bricks which had been saturated with various salt solutions.


pH and Merck Strip Test (for identifying presence of chlorite, nitrate and sulphate) results for our 4 samples.


Wednesday 18th May 2011; Moisture

Week 6 of 12 
Module 4: Deterioration Mechanisms; Methods of Survey & Analysis

Our lectures continued with Ippolito Massari today discussing the diagnosis of moisture sources and methods for control.

We often discuss the issues associated with using the wrong mortar for pointing, but what about using no mortar. I have tended to think about joints missing mortar as being traps for water running down a building and allowing the water to enter the stone because it is not being 'wicked' by the mortar. In fact there's a more technical issue being faced here, which is that water trying to evaporate from the recessed mortar joint will tend to cause such an increase in water vapour within the empty joint space that it will re-condense as liquid water before it leaves the structure, and therefore retaining the water and continuously circulating it. It is the circulation or flux of water that is the danger associated with water in masonry, in a stable environment the same problems will not be experienced. Therefore if a wall that we wish to conserve is wet we have two options; 1. fully dry the wall (there is no purpose in partially drying a masonry structure) or 2. stabilise the environment.

Stabilising the environment in a dwelling is not possible like in a museum-type environment, because we aim to live in dry and warm buildings with good ventilation to prevent water from condensing on internal surfaces. As mentioned yesterday (Day 24 (17.05.2011)) our historic buildings were usually designed with an inbuilt ability to create a suitable internal living environment. Now our requirements of inside spaces have changed and most people wish to live within a draft-free environment, blocking up any possible space where a draft might enter. In doing so, however, we hinder the ventilation that is necessary for preventing the accumulation of air vapour which condenses on our walls and encourages the growth of mould. This problem is particularly prevalent in Scottish houses built with hard impermeable stones, such as granite in Aberdeen, and where they have been re-pointed using hard impermeable cement mortar. Many of these homes also have the original wooden sash and case windows, which have a natural ventilation, replaced with air-tight PVC windows with a small air vent, which home-owners commonly block-up to prevent the draft (also common in Italy apparently). The result of this is an air-tight box and any moisture created inside (e.g. steam from a kettle or water vapour from breath) will be trapped. A detached house is likely to have a more stable environment throughout the structure where there is sole occupancy, whereas in a block of flats it is likely that each set of occupants will heat or ventilate their flats differently causing large variations in moisture and vapour movement throughout the building.

The final part of this set of lectures dealt with the possible solutions to the issues associated with moisture ingress; Ippolito pointed out that although similar solutions may be appropriate for each project, there is no way of having a standard because there will always be different factors that influence the movement and accumulation of moisture in each different building. It is essential to correctly identify your moisture sources so that you can implement the appropriate solution; the solutions appropriate for rising damp due to capillarity from dispersed water will be very different from those suitable for dealing with capillarity from ground water. Any intervention work should always be carried out by an expert.

18 May 2011

Tuesday 17th May 2011; Moisture

Week 6 of 12 
Module 4: Deterioration Mechanisms; Methods of Survey & Analysis

Ippolito Massari, an engineer and expert on humidity and water, spoke to us today about 'Moisture Sources and Effects' including a visit to the Basilica di San Clemente this afternoon to see some of the theory in action. We were shown classifications for the various forms of moisture ingress that that we find in buildings; capillarity, condensation, hygroscopy and infiltration. Crucially it is the movement of moisture that causes problems in buildings, a stable environment reduces the possibilities of deterioration of stone.

Ippolito highlighted the point that it is always important to think about the less obvious reasons for the causes/sources of damp, e.g. why is there more condensation in a church in the summer?- possible answer; because more people are exploiting the cool environment of a church and therefore producing a higher amount of air vapour present. Obviously in the majority of cases there are likely to be multiple sources of the damp in buildings. Equally when first assessing an area of damage it is important to identify if the source of the problem has been fixed or if the problem is ongoing.

When considering water movement around a masonry structure we need to understand the materials with which we are dealing. It is important to remember that a porous material is not necessarily permeable, and a permeable material does not necessarily have active capillaries (i.e. it cannot 'suck' water). A good example is when thinking about two very different materials; clay and gravel. Clay is composed of particles with a very small grain size. If water tries to enter from above then the clay expands like a sponge and although the water will enter to a certain level, the expansion will prevent the movement of water downwards. If water sits below a layer of clay the water is able to rise through capillary action. Gravel has almost the opposite characteristics; water entering from above will permeate very easily through the material, but the spaces between the grains are so large that there is little to no suction by capillary action. Essentially there is an inverse relationship between capillarity and permeability; these properties have commonly been utillised historically in building construction.

It is common to see rising damp appearing on walls in waves- the higher water marks are frequently interpreted as being where there is a higher input of water, however the usual explanation for this is that this is where the wall has a greater thickness. Evaporation is the major factor that reduces capillary rise and a thicker wall with the same evaporation surfaces will allow greater capillarity enabling the dampness to reach a greater height. It is important to remember that rising damp is not always the result of proximity to the water table, it can be the result of water entering the soil through rainwater dispersal, leaking underwater transport systems, etc. These sources will also produce uneven water marks but for different reasons. If you wish to solve the associated issues correct interpretation is essential.

Many historic architectural designs incorporated structures and solutions to handle the issues associated with water movement, for example the Romans commonly built vaults below their buildings to allow ventillation and evaporation of moisture before it reached the occupied spaces. The fashion for utilising these spaces causes widespread problems with damp in buildings due to the impermeable layers which are inserted to try to make these spaces dry and habitable- something for which they were never intended.

We discussed various methods for testing the water content in a building including electric resistance metres and chemical measurements, however these have issues associated with interpretation of the results; electric resistance only shows you the surface moisture in a wall and can be affected by the presence of salts, and chemical measurements are highly dependant on sampling technique and application of the method. The only true test of moisture content is by testing variation in density of a wet and dry sample of stone in a lab, but clearly this is a destructive method and not always appropriate. We tested some of the methods discussed on our site visit to the Basilica di San Clemente this afternoon.

One type of electric resistance metre being tested on a wall in the Basilica di San Clemente.


One of the underground vaults below the Basilica.

16 May 2011

Monday 16th May 2011; Micro-Destructive Diagnosis, Analytical Techniques & Cimitero Worksite

Week 6 of 12 
Module 4: Deterioration Mechanisms; Methods of Survey & Analysis

Marisa Laurenzi Tabasso (see Day 20 (11.05.2011)) returned today to discuss 'Micro-Destructive Diagnostic Criteria & Techniques' and 'Sampling Methodology and Techniques'. Diagnosis of deterioration should form the basis and reference point to plan and design the conservation intervention; 'we cannot conserve what we don't know'. As Marisa identified, far too often it is the conservation decision that comes first, and then the diagnosis of deterioration.

In an ideal situation a conservation scientist should be employed from the start of any conservation project to be involved in the sampling, analysis and interpretation. A scientist unfamiliar in the field of conservation may provide highly accurate results, but will not have the same skills or insights for making the interpretations, which are arguably the most important part of the analysis.

14 May 2011

Friday 13th May 2011; Climatic and Environmental Impacts


Week 5 of 12


Module 4: Deterioration Mechanisms; Methods of Survey & Analysis


Today Peter Brimblecombe, Professor of Atmospheric Chemistry at the University of East Anglia, discussed the topics ‘Environmental Factors of Deterioration’ and ‘Air Pollution and the Interaction of Water and Porous Building Materials’ with the group. Interestingly the issue of air pollution has been discussed for many centuries, originally referred to as ‘smoke’ in early documentation as that would be how it manifested itself. Now, however, in the majority of locations air pollution is no longer a visible thing, and in relation to stone structures it has a profound effect although this can be extremely difficult to visualise or to capture. Peter has told us that modern atmospheric deposits contain less sulphur and more nitrate than historic atmospheric deposits due to the transition from the use of coal to petrol as a fuel.


Thursday 12th May 2011; Stone Deterioration Mapping

Week 5 of 12
Module 4: Deterioration Mechanisms; Methods of Survey & Analysis

We were mostly at our work site in the Non-Catholic Cemetery, Rome, today, mapping the deterioration patterns present on our assigned monuments/grave stones. The day started and ended in the classroom firstly discussing how we should approach this task, and at the end of the day discussing how each group had carried out the task and any issues faced. At the cemetery we met Nicolas Stanley Price who sits on the Board of Directors of the Cemetery and who is a past Director General of ICCROM.

Although the ICOMOS Glossary (see Day 20 (11.05.2011) is a fantastic resource, we realized that it is not always possible to follow it entirely. Many forms of deterioration could be seen to fall into more than one category, or within a group there were disagreements between the meaning of the descriptions given. We also found that some definitions were missing, such as where part of a structure appears to have integrity but when tapped it is clearly heard to be detaching from the substrate.

11 May 2011

Wednesday 11th May 2011; Non Destructive Investigative Techniques, Palatino Visit & Stone Decay Terminology


Week 5 of 12
Module 4: Deterioration Mechanisms; Methods of Survey & Analysis

This morning we went to the offices of Giorgio Croci & Associates 
and met Giorgio's colleague Cristiano Russo who demonstrated some of the non-destructive equipment that they use for investigation of stone structures. We then went to Palatino (the Palatine Hill) and visited the 'House of Tiberius' excavation site- including being allowed into the underground vaults not yet open to the public. Here we met the architect and archaeologist in charge of the project who gave us some of the history and details of the work being carried out. Following that we visited
 Santa Maria Antiqua where 
we met Werner Schmidt, a leading figure in wall painting restoration, who showed us the conservation works being undertaken at this site.


Cristiano Russo demonstrating some of the equipment used by 
Giorgio Croci & Associates.


House of Tiberius excavation site.


Vaults below the House of Tiberius excavation site.

Werner Schmidt speaking to the group at Santa Maria Antiqua.


Conservators at work inside Santa Maria Antiqua.


This afternoon Marisa Laurenzi Tabasso, Conservation Science Consultant, spoke to us on the topic of 'Morphology of Stone Decay Including Terminology and Mapping Techniques', with a focus on the 'ICOMOS-ISCS: Illustrated Glossary on Stone Deterioration Patterns' (free PDF version available to download). The glossary began as an English : French version but is continuously being translated into additional languages; Irakli (Georgian participant) is currently working on the Georgian translation. It is the only international glossary on stone deterioration. By standardising terms in this manner, it allows us to know exactly what another person means when they use a specific term; cross discipline and cross language. I believe that anyone working with stone should have a copy of this book on their desk for reference, even if you have slightly different ideas on some of the definitions.

The glossary describes purely those features of stone deterioration that are visible with the naked eye and it therefore helps you to define the 'what?', but not the 'why?' or 'how?'. The terms relate to deterioration on specific stone elements and do not relate to the description of the deterioration of a whole structure. The glossary should be used as a 'tool' for conservation but it is important not to be constrained by it if your observations do not perfectly fit one of the descriptions.

Marisa also gave us some details about the original Italian Glossary 'Description of the Alteration- Terminology & Description'. This glossary groups 'Decay', 'Damage' and 'Deterioration' simply as 'Decay' and Marisa makes the point that the are all 'negative' terms, for which reason it can be difficult to decide which of the three terms present in the ICOMOS glossary should be chosen.