Search This Blog

4 June 2011

Friday 3rd June 2011; Venice

Week 8 of 12 
Module 5: Conservation Interventions and Treatments; Criteria for Selection and Implementation 
The Study Tour: Venice


This morning we left Parma for Venice. We arrived around midday and met Paolo Pagnin, a stone conservator with Lithos Restauri (another of our predecessors having taken the ICCROM Stone Conservation Course in 1985). The main focus of today was our visit to the Basilica di Santa Maria Gloriosa dei Frari (Church of the Frari) where Paolo has been involved in many separate conservation projects. 


More details to follow...


The Basilica di Santa Maria Gloriosa del Frari, Venice.


Rising damp issues on the outer walls of the 
Basilica di Santa Maria Gloriosa del Frari.
Cleaning work carried out on a sculpted element of the external facade of 
Basilica di Santa Maria Gloriosa del Frari with a small black patch having been left to show the soiling that was present prior to cleaning.
Inside the Basilica which is filled with many individual but large-scale stone tombs each in a different state of condition in terms of deterioration and conservation.
An element of one of the tombs inside the Basilica which is currently being monitored due to the deterioration that is occurring.
An example of a recently done steel clamp fixed with lead in one of the 409 Venetian bridges.


We visited the Chiesa di Santa Maria dei Miracoli which is thought by many to be one of the most beautiful churches in Italy. It has many issues with moisture damage due to its position directly beside a canal. Inside it is possible to see the difference in damage between the canal side and other side of the chapel. On the facade of the church there is a sculpture above the doorway which was fully immersed in epoxy resin for consolidation but it is expected that the sculpture will turn more and more yellow over time due to the alteration of the epoxy.

Chiesa di Santa Maria dei Miracoli with one foot in a canal.
The sculpture above the door of the 
Chiesa di Santa Maria dei Miracoli 
which has been fully consolidated using epoxy resin.


We continued to wander around Venice and paused at the Chiesa di Santa Maria Formosa where we observed the results of some cleaning trials that had been carried out.


Paolo showing us a sculptural element on the Chiesa di Santa Maria Formosa which has been quartered and three of the segments treated using different cleaning methods. 12-3 = original patina, 3-6 = biological poultice, 6-9 = ammonium carbonate, 9-12 = unknown.

3 June 2011

Thursday 2nd June 2011; Stefano Volta's Workshop- Grouting, Pining and Cleaning Techniques

Week 8 of 12
Module 5: Conservation Interventions and Treatments; Criteria for Selection and Implementation
The Study Tour: Collecchio, Parma

We were back at Stefano Volta's Workshop all day today for more hands-on trials. Today we looked at methods of grouting, pining and cleaning stone.

The dry results of the pointing Jiyoung and I carried out yesterday.
Grouting. Stefano explained the need to a grout to be hydraulic (either naturally or by adding a pozzolan) to allow the mortar to carbonate within the stone where air cannot reach. He mixed up two grouts, one with 1 part lime putty to 1 part pozzolana and one with 1 part NHL 5 to 1 part cocio pesto (brick dust). The cocio pesto is added mostly as a filler to the NHL 5 but it will also provide an additional set. Water and alcohol was added to the mortars to make them more fluid. We were shown, and tested for ourselves, the technique of using a syringe to add a grout into a crack working from the base upwards and closing up any outlets with sculptors clay to hold the grout in the stone. The clay can be removed and brushed off once the grout has dried although a different technique may be needed on more porous stones where the clay may go inside the pores.
Pining. We were shown the wide variety of pins available including stainless steel, fibre glass, ceramic and wood by Gionata Rizzi and Stefano.
Pinning two parts of a column together. We were shown the technique for reattaching two pieces of stone together with a simple break by pinning. Stefana showed us a good technique to ensure that you correctly position the pin so that it creates a good fit; 1. place a spot of paint on one of the broken edges where you want the pin to be located. 2. Put the second piece into position on the first piece and then remove, the paint spot should be transferred onto this piece so now you have the position of both drill holes. 3. Mark two lines down the side of the object perpendicular to each other (in the case of the column around 90o apart around the column drum) and perpendicular to the direction that the drill bit will move. 4. Reposition the second piece and continue these lines across onto its surface then remove. 5. Drill the holes into both pieces aligning the drill bit with the lines drawn (it is best to do this with other people watching the alignment). NOTE: you should only ever use a rotational drill on stone- a hammer drill will produce micro-cracking. 6. Place epoxy resin into the hole and push pin with an angular end into the hole, place epoxy resin into the other hole and place onto the pin attaching the two pieces together. If required mortar can be placed between the two pieces before piecing together.


Pinning two parts of a column together.
Gionata Rizzi showing us a historic pining system. Molten lead was poured into a hole around an iron bar in one stone to attach one side of the 'bar' and allowed to cool. Lead was then poured into the other hole and the first piece was inverted and the other end of the iron bar was inserted into the molten lead. 
The historic method for clamping two pieces of stone together. Stefano demonstrated the technique of melting lead and using it for fixing a clamp in place.
Close up view of a steel clamp fixed with molten lead. A small scratch-sketch can be seen to the right of the clamp where David Odgers (who is with us on the tour Tuesday-Saturday) demonstrated the 'butterfly' system often used in the UK where notches were cut out of each piece of stone and then molten lead poured in the space creating a tie.
Some of the shelters created by Stefano in collaboration with Gionata Rizzi.
Dry air abrasive cleaning system.
Nebulised water sprays which act like an even rain falling on the stone and may produce a washing effect but also aid the use of brushing the stone.
Atomised water sprays- a recent improvement to the nebulised water sprays which produce a 'cloud' like emission of water which allow it to penetrate further into the stone but uses far less water than the nebulised water system.
JOS- wet pressurised abrasive cleaning system using CaCO3 (Carrara white marble dust) as the abrasive.
Micro-abrasive cleaning techniques (like a dentistry tool) can be used for fine details and in combination with other techniques which can remove the majority of the undesirable layer.

DOFF- super-heated steam cleaning system. This acts in a similar way to the atomised water but because it has heat as an addition this can aid certain forms of cleaning.

2 June 2011

Wednesday 1st June 2011; Parma & Stefano Volta's Workshop

Week 8 of 12
Module 5: Conservation Interventions and Treatments; Criteria for Selection and Implementation The Study Tour: Parma

This morning we headed into Parma to visit the Cathedral, Baptistry and briefly the Museum before going up the scaffolding surrounding the Cathedral Bell Tower. Silvia and Stefano Volta, conservator-restorers, joined us to discuss the conservation work that they have been involved with on these structures. A fire broke out in the steeple of the 13th Century Cathedral Bell Tower in the 1990s following a strike by lightening and its structure of wooden batons below a copper roof provided a perfect furnace so the fire burnt for many hours. When the conservation work began the copper was removed and a glazed brick steeple was found to be concealed below. The brick design has a repeating pattern of four courses of black-glazed bricks followed by four courses of white-glazed bricks. Because the fire was able to achieve very high temperatures many of the bricks were heavily damaged and are being replaced with bricks which have been made to a traditional specification. The glaze on many of the remaining bricks can be seen to have been altered during the fire. The decision was made that the spire should have its copper reinstated and therefore the new bricks have not been glazed.

The mural paintings on the ceilings inside Parma Cathedral by Correggio.


Below the Cathedral the columns are being monitored for movement and some have been wrapped with carbon fibre.


The burnt bricks on the spire of the cathedral with new unglazed brick indents.


Discussion at the top of the scaffolding (70 metres high); the top of the spire waiting for the golden angel is in the foreground. L-R Simon Warrack (Course Coordinator ICCROM), Keisha Fong (Course Coordinator Getty Conservation Institute), Silvia Volta (Conservator).


This afternoon we went to the workshop of Stefano Volta, a conservator-restorer, in Collecchio. We were set a practical exercise of carrying out some crack pointing of masonry elements. We were given a base mortar which was 1 part lime putty : 1.5 parts river sand and we added a further 1.5 parts of aggregate in the form of coloured sands and pozzolan to create a 1 : 3 mortar which would match the appearance of our stone. Stefano uses a traditional mortar mixer which is the type used all over Italy (see image below).

Me and Jiyoung (Korean participant) working on our pointing exercise.


A traditional Italian mortar mixer; the two wheels rotate vertically and they are both rotated horizontally to produce a good mix.

1 June 2011

Tuesday 31st May 2011; Carrara

Week 8 of 12 
Module 5: Conservation Interventions and Treatments; Criteria for Selection and Implementation 
The Study Tour: Carrara


We moved on from Pisa to Carrara today going via a famous masonry tool shop Milani Utensili to pick up a few souvenirs. In Carrara we drove up the mountain to one of the large areas of quarrying and were taken up to one of the active quarries where we could observe the stone being extracted from the mountain in much the same way as used in the Travertine Quarry we visited near Tivoli (see Friday 29th April 2011; Tivoli and De Tomassi Workshop Visits). 


The open cast white marble quarry at Carrara that we visited.


We were then taken to a quarry within the mountain which is being worked at a relatively slow rate and is producing the high quality white marble commonly used for sculpture. The photograph below shows one of the chambers from which the stone has been extracted with marble ceilings 15m high and vast pillars no more than 30m apart. It is a relatively slow working quarry with c.40,000 tonnes of marble extracted in the last 15 years from the chamber in the image below (1 cubic metre of marble weighs approximately 3 tonnes). Following this we had a brief visit to a private museum which has been set up beside the quarrying site created by one of the old quarrymen showing some of the historic quarrying techniques including techniques for splitting, cutting and moving the stone.

Inside one of the chambers of the white marble quarry deep within the mountain.


An ancient technique for splitting stone- wooden wedges were inserted into a crack and then wetted to cause expansion of the wood.


This afternoon we visited the workshop of Bruno Luccetti connected to the external quarry where we saw the stone being extracted this morning. We observed the various cutting and polishing techniques used for preparing the marble for use as internal slabs. As well as the local Carrara white marble, stone is imported from all over the world to be processed here. In contrast the travertine from Tivoli is too expensive for them to buy in; they source the travertine that they process and sell from Iran. Little stone is imported from countries where the low cost of the labour force makes the cost of cutting stone in Italy uncompetitive (e.g. India).


Some of the varieties of stone available in the Bruno Luccetti workshop.


This evening we arrived in Parma where we will be spending the next few days of the tour.

31 May 2011

Monday 30th May 2011; Firenze (Florence) and Pisa

Week 8 of 12 
Module 5: Conservation Interventions and Treatments; Criteria for Selection and Implementation 
The Study Tour: Florence (Firenze)


Yesterday we began our study tour of Northern Italy driving from Rome to Firenze (Florence). The afternoon was ours to spend as we chose and the group mostly divided between the Uffizi Gallery and the Bargello National Museum. A few of us also managed to fit in a climb up the bell tower that's part of the Basilica di Santa Maria del Fiore (a.k.a. the Duomo).


View of the Duomo, Firenze, from the tower.


This morning we first headed to the Opificio delle Pietre Dure where we visited the museum and then the restoration laboratory. In the museum we were talked through the history of the Opus Sectile technique where by precious or semi-precious stones are precisely cut to create an image. The photographs below show a pair that were present in the museum of the initial painting and below it the opus sectile that was created using the painting as a guide- as you can see it is quite incredible how much detail these artists were able to achieve. The museum holds a fantastic collection of the precious and semi-precious stones from around the world displayed in glass cabinets and examples of 19th Century work benches where the pieces of stone were able to be finely carved.


A painting the was produced as a means for creating an opus sectile. This scene illustrates stone masons.


An example of one of the opus sectile which has been prepared based on the painting above.


Display showing work benches for preparing the tesselae.


In the laboratory we were shown some of the current stone conservation projects being undertaken including restoration of stone sculptures and mosaics. We also saw some new mosaic and opus sectile work which was being created by restoration students. What was fantastic to see was that the same workbenches and techniques that we'd observed just 30 minutes before in the museum were still being used in the workshop today (see photo below).


The restoration laboratory where the 19th Century workbenches and techniques are still being used today for finely carving stone.


We then had a brief visit to the Museo dell'Opera di Santa Maria del Fiore where Peter Rockwell (who's accompanying us for the first part of the study tour) showed us an incomplete sculpture 'Pieta' by Michelangelo and other select pieces. The sculpture was originally created to go on Michelangelo's own tomb but he took a dislike to it before it was completed and it was never finished. Peter thinks that one of the major factors that would have made Michelangelo dislike this sculpture is the disproportionately small Mary Magdalene figure on the left-hand side of the group (see photograph below). Another sculpture (dated 1334-36) that Peter picked out to show us was by a sculptor called Andrea Pisano and depicts a stone mason at work illustrating the many different tools that were used at that period and most of which are still in use today (see photograph below). One tool that Peter pointed out is no longer used in Italy is the round-headed hammer; in Scotland we call this a 'mell' and it is in common use today made from metal, wood or fibreglass.


Michelangelo's Pieta.


Peter Rockwell with a stone carving by Andrea Pisano depicting a stone mason dated 1334-36.


We then continued our travels and moved on to Pisa where we received a presentation regarding the conservation work carried out on the 'leaning tower' in the last decade and then explored the World Heritage Site including climbing the tower.  Climbing the tower gives you a very strange sensation, something like sea-sickness; the staircase winds clockwise around the inside of the building within two walls, and although you are constantly going 'up' the stairs, the angle as you walk towards the overhang is low and as you walk away from it is high. 


The Leaning Tower of Pisa. 


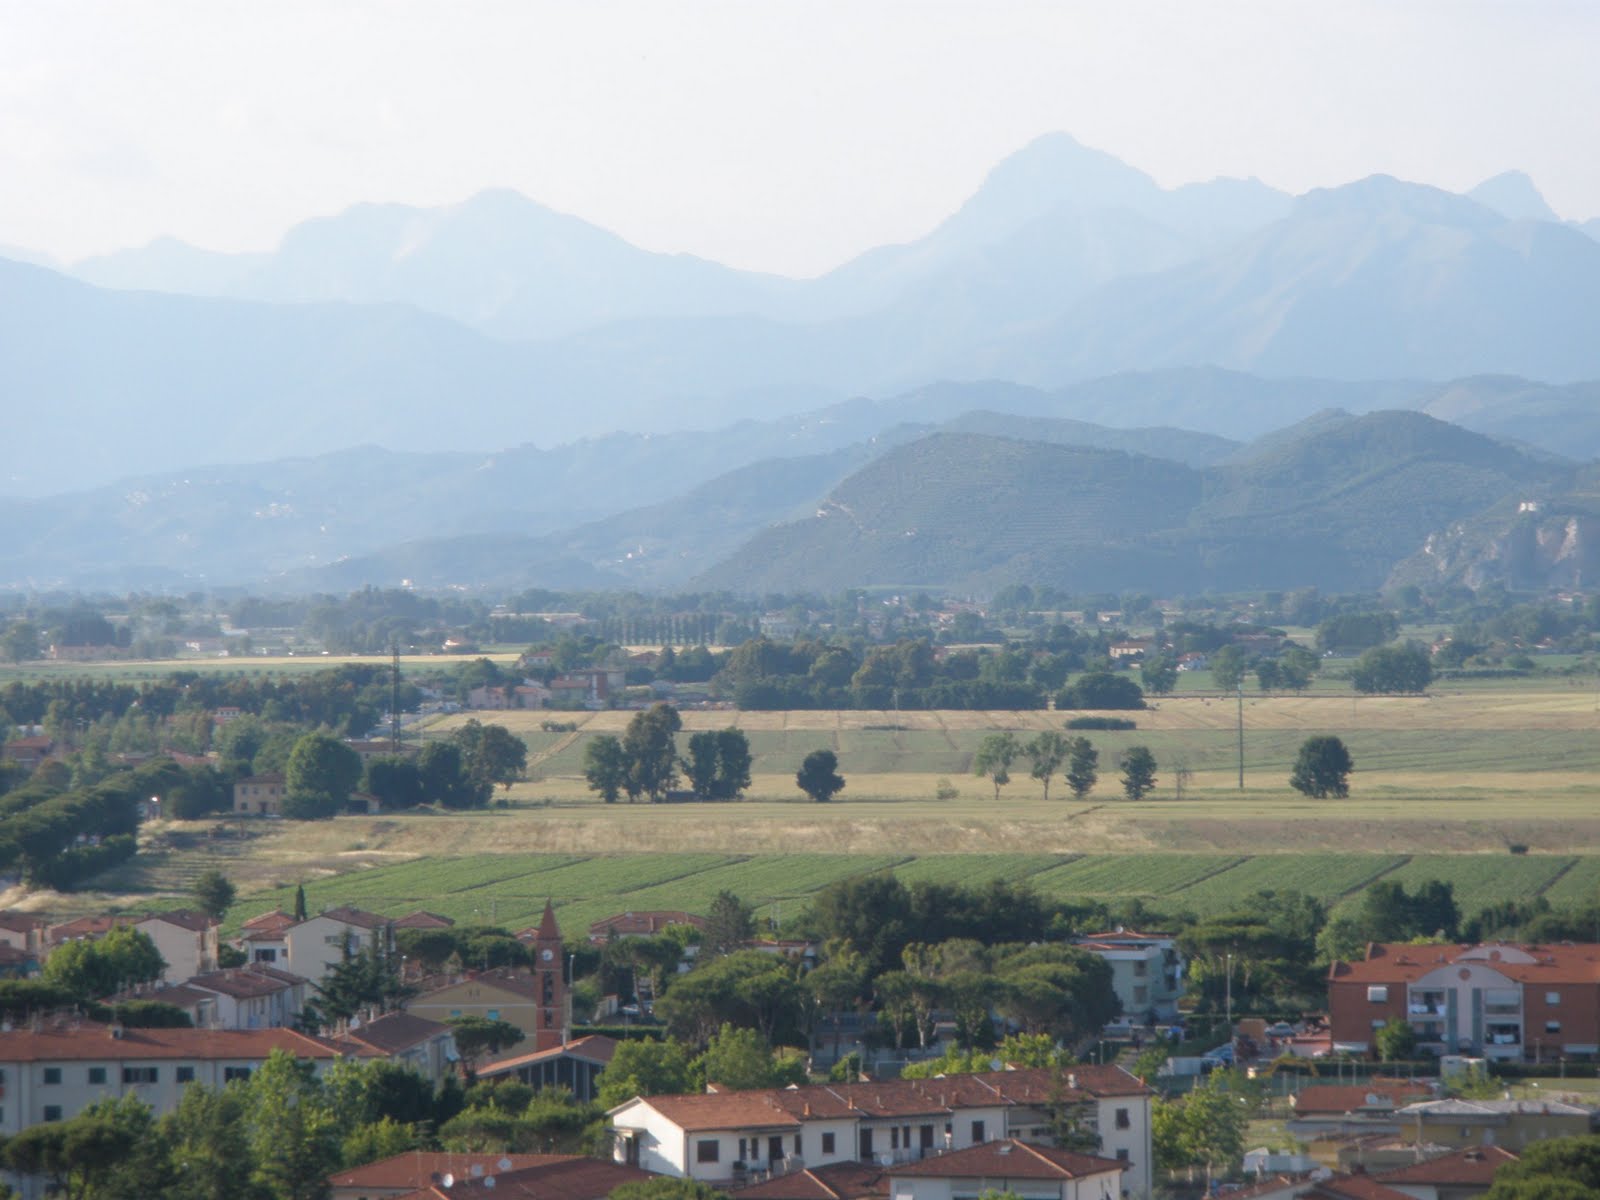
Tomorrow we continue on to Carrara to visit the famous white marble quarries in the Apuan Alps, which were just visible from the top of the tower.


View from the tower; the mountains containing the Carrara white marble quarries (just visible in the distance at the top of the mountains in the left-hand side of the picture).

29 May 2011

Friday 27th May 2011; Surface Treatments and Cleaning Techniques

Week 7 of 12 
Module 5: Conservation Interventions and Treatments; Criteria for Selection and Implementation

David Odgers was with us all day today speaking to us about surface treatment of stone and cleaning techniques. Both of these topics are highly relevant to my work at the Scottish Lime Centre Trust because we are constantly dealing with the problems caused by past inappropriate surface treatments and cleaning techniques and provide advise on methods for the future. In the last session of the day we were presented with a tricky and on-going case study which we discussed in small groups. This was a great opportunity to think through the issues that we have been discussing, from both a materials and a conservation perspective.

Details to follow...

Thursday 26th May 2011; Vatican Visit, Archaeological Site Repairs & Wells Cathedral Case Study

Week 7 of 12 
Module 5: Conservation Interventions and Treatments; Criteria for Selection and Implementation


We were very privileged to have a visit to the Vatican today to meet Guy Devreux, head of the Stone Restoration Laboratory to be taken behind the scenes and shown some of the current projects being carried out. Guy is another predecessor of ours having studied on the ICCROM Stone Course in 1991.

We visited the site behind the screened part of the Colonnade to observe the conservation works being undertaken.


This afternoon Gionata Rizzi showed us some of the archaeological site projects he has worked on as case studies followed by David Odgers giving us a case study of conservation work carried out at Wells Cathedral in Somerset, England.

Details to follow...

26 May 2011

Wednesday 25th May 2011; Structural and Architectural Repairs

Week 7 of 12 
Module 5: Conservation Interventions and Treatments; Criteria for Selection and Implementation

This morning Ian Hume, a conservation structural engineer from the UK, joined us to speak about 'Structural Repairs'. I was very pleased to see Ian Hume teaching on this course because he is one of our trainers at the Scottish Lime Centre Trust where he teaches a course on the Structural Repair of Historic Buildings. The main subject of Ian's lectures was 'cracks' and their interpretation. We get very worried if we see a crack in a building but Ian has told us to assess each situation separately to identify if the crack is worth worrying about. A good example of the extreme contrast in danger is that if a crack appears on an oil rig which is 0.1mm wide we may have reason to worry, whereas on a historic building it is possible to have a crack up to 1 metre wide and it will not necessarily be a concern (although I would imagine this is only the case if we're talking about a ruin!). The key things to identify are; is the cracking live? Is the cracking structural or due to other factors? Is it a seasonal or cyclic cracking? Where cracks are present in a structure we do expect them to have some movement due to thermal expansion and contraction and as long as the crack is not getting wider in the long term this is most likely not a concern. A problem faced with seasonal cracking however is that a ratchet effect can occur whereby debris falls into the crack when it's at its widest and it is then not able to contract to its starting position and the crack will widen.

To identify if a crack is active or inactive you should always measure it over a period of time (bearing in mind seasonal movement) but there are also pieces of evidence you can look for such as does the crack look fresh/sharp (new?) or are the edges rounded (old?), is it full of debris/cobwebs (old?), if an internal wall is cracked is the cornice also cracked? Some cracks may have existed in a building since it was constructed due to the subsidence that occurred from the weight of the construction materials- this should not be a concern.

Although it is possible to calculate a certain level of stresses and strains on an historic building, Ian believes they they are not definitive and should only be used as a guide. Temporary works are extremely important and often they can be in place for a very long time so they need to be well thought out and durable. This can be difficult because good attachment to the structure is not always possible. Ian was very clear on the fact that we should always employ an engineer with experience of historic buildings; as a young engineer in the 1970s he severely over engineered an historic structure which he believes could, even now, survive a nuclear attack but was not carried out in a manner sensitive to the site (see image below).

Ian showing an image of one of his first jobs as a conservation structural engineer where he believes he might have over done the reinforcement... (just the walls are original).


This afternoon Gionata Rizzi spoke to us about Architectural Repairs. One of the biggest questions seems to be how can we repair something without faking it? In relation to mortar Gionata suggests that one way we can make it clear for future that a mortar is not an original would be to use polypropylene fibres (in place of hair which give a mortar strength). This way if the surface of the mortar is scraped back the fibres would be visible and it would be clear that this is a modern material. A building that has come up in conversation a couple of times now is the Temple of Athena Nike which is located on the Acropolis in Athens, Greece and has recently been restored. Although a large proportion of the original blocks still exist, many parts were missing and the recent restoration included highly skilled masons carving the missing elements out of a stone found to match the original to complete the wall once again. There is no question about the skill involved to do this but Gionata asks; does this fake the discovery of the missing pieces? Should the missing elements have been recreated in mortar rather than stone? Our eyes are drawn to the restoration before the original, is this wrong? The image I have added below of one of the walls is poor but if you click on the link above you will find many links to images and websites dedicated to this structure and can decide for yourself.

A restored wall of the Temple of Athena Nike.

25 May 2011

Tuesday 24th May 2011; Repair Approach & Options Overview

Week 7 of 12 
Module 5: Conservation Interventions and Treatments; Criteria for Selection and Implementation

Gionata Rizzi and David Odgers both rejoined us today to give us an overview of the conservation approach and options for repair. Gionata started with the example of the famous Marcus Aurelius bronze statue which stood outside in Rome from 176AD (in Piazza del Campidoglio, Rome, since 1538AD). In the 1980s it was considered to be deteriorating but what was the most appropriate solution to this problem; leave it outside? Bring it inside? Protect it in situ with a shelter? Remove it and replace it with a modern sculpture? Remove it and replace it with a replica? The result of the debates that went on were to move the original inside and to replace it with a replica (see photographs below). Was this the correct decision?

Gionata Rizzi with his likeness Marcus Aurelius (the genuine original sculpture) debating the options of how to protect the famous sculpture.

The replica of the bronze Marcus Aurelius sculpture which is in place in Piazza del Campidoglio.


When undertaking conservation work we have the debate as to what are the most important values of a structure. Does appearance come before function or function before appearance? When we are working outside our own countries or cultures it is also essential that we fully understand what a structure means to the local people. I believe it was Simon Warrack who gave us an example recently of a sculpture of a God within a temple which had lost 3 of it's 8 arms which are essential for its correct representation. We may debate that it's incorrect to 'restore' this sculpture with new arms, however the key value of this sculpture is related to its form and not it's history and therefore in this case it may be considered appropriate to carry out the restoration. David listed the four main values that we assign to historic structures which are historical, evidential, aesthetic and communal. The order in which these are put will vary from project to project and from person to person.


We had a discussion on the values of 'reversibility' which is increasingly documented in charters as what we should always be aiming to achieve with conservation work. The general feeling seems to be that although this may be a desirable quality it is rarely achievable. The argument may be better if we aim for 'compatibility' rather than 'reversibility'. The use of organic resins is considered to be reversible because technically they can be dissolved, however in practice it is almost impossible to fully remove them from a stone. 


When we do proceed with conservation work one of the most important things for us to do as conservators is to record everything. A condition report and schedule of works should be written for someone else in 50 years time and who may never have visited the site, therefore details which may seem obvious to us must still be recorded. It is essential that in such records we always use the cardinal points (N, S, E, W) for locations because we do not know how the surrounding environment or position or a structure or object may change before our documentation will be revisited. 


When making the decisions about repairs on a historic structure we must remember that it may well be several decades before this type of work is carried out again and therefore we need to consider future preventative measures as well as solutions for present issues. David presented us with a very interesting case and not one with an easy answer; if you have a ruin where much of the stonework is heavily decayed, what is the best solution? Potential answers include; do nothing, replace the stonework following the original profile (see image below), replace the stonework following the current profile, falsely weather the stone to blend in with the present masonry... Here we need to consider many different values including form, function, material etc. To guide us to an answer we need to consider; what we know (e.g. current condition), what we think we know (e.g. the likely effect of our treatment/repair) and what we don't know (e.g. what conditions, use and maintenance will occur in future).


David Odgers asking us how we would carry out this repair on heavily weathered stonework.


Below is a quote from Donald Rumsfeld (former US Secretary of Defence) shown to us by David, which although on a different subject sums up very nicely the issues we face in conservation.

Donald Rumsfeld 2002.